
This is the manual that ships in the box, as a web page: every step, every drawing, the temperature table and the range calibration. It is the maker's own text, so what you read here is exactly how the device is meant to be used.
Download the printed manual (PDF)Product labelling
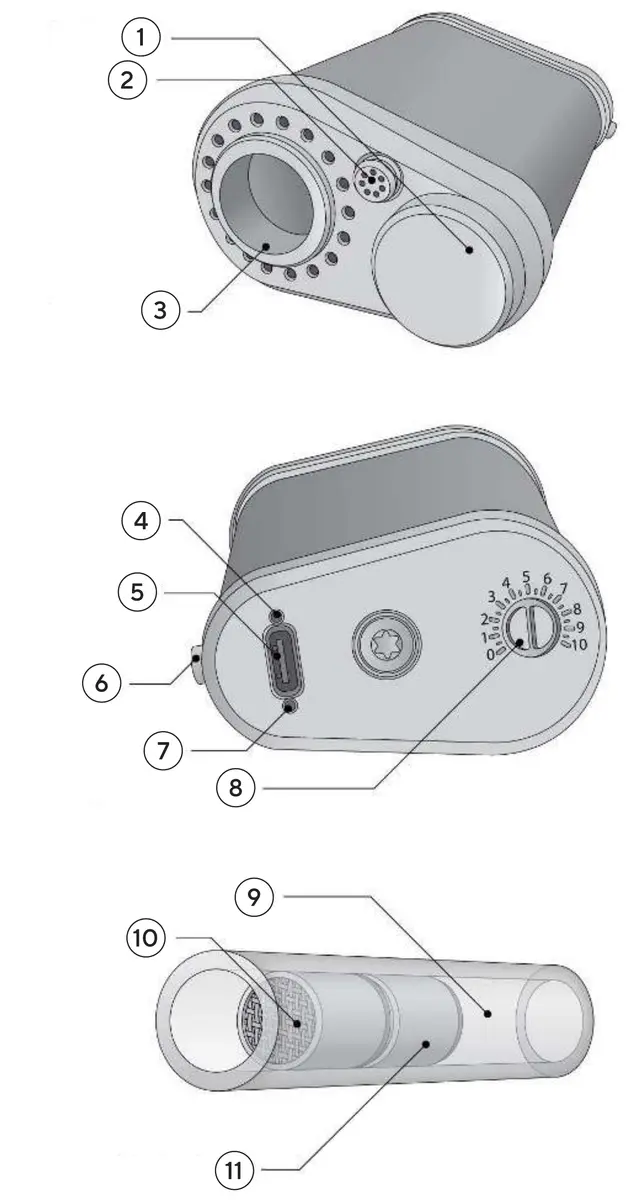
- Battery lid
- Multitool
- Tube holder
- Power LED
- Charging connector
- Button
- Charge LED
- Temperature level
- Tube
- Herb chamber
- Cooling unit
Getting started: two modes
Two modes, two ways to use the Tinymight 2:
1. On-demand mode
The unit heats up only while the button is held down. Hold the button, inhale after the unit has vibrated, release the button.
2. Session mode
The unit heats up and keeps the temperature stable until it is turned off. Hold the button to boost the temperature. Some call this a hands-free mode, as pressing the button is not needed while using it.
A. Herb placement
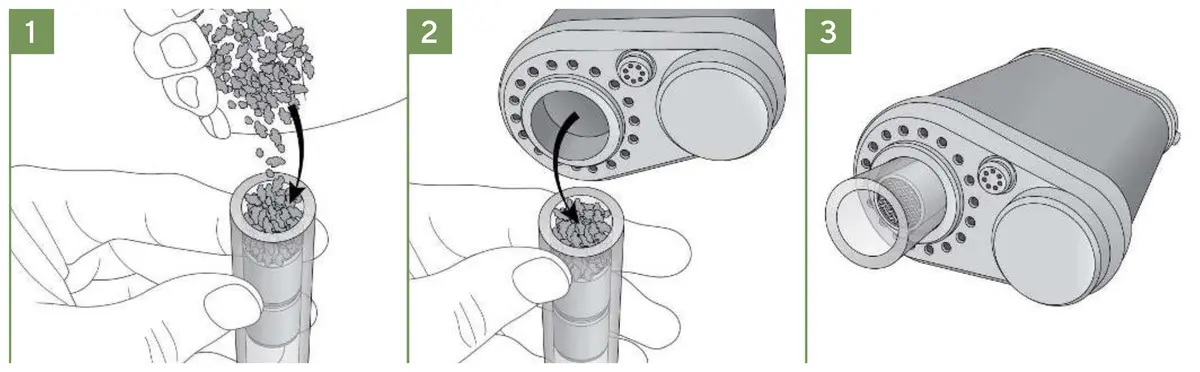
- Hold the unit upside down, pull out the tube and place the herb on the screen.
- Push the tube back into the unit while holding it upside down.
- Herb placed.
B. Adjusting the temperature level
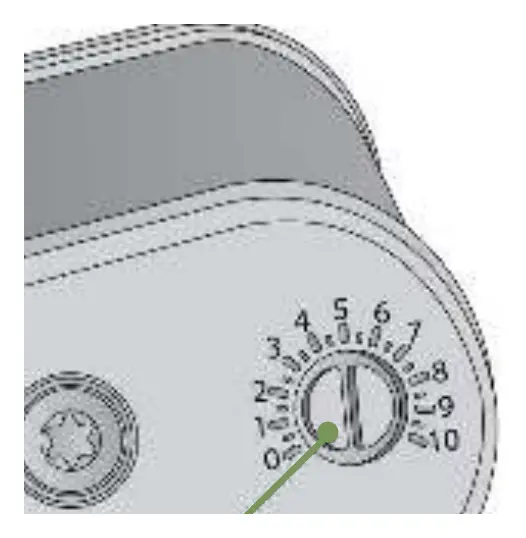
There is a temperature dial on the bottom panel. You can adjust it easily. See Appendix 1 for the temperature at each setting.
C. Turning on the unit
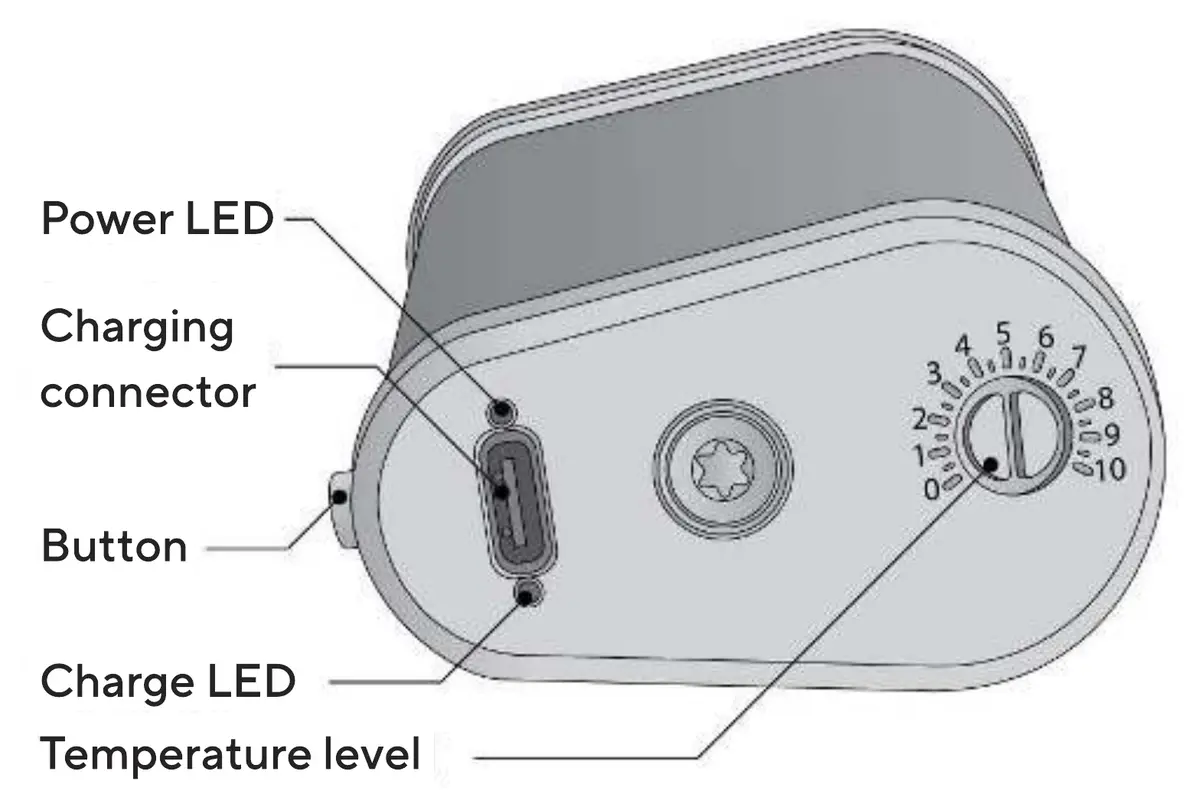
On-demand mode: press the button three times quickly.
Session mode: press the button three times quickly and do not release it until the unit has stopped vibrating.
D. Turning off the unit
Press the button three times.
E. Battery charging
Insert a USB cable into the charging connector. The red charge LED is on during charging and turns off when charging is complete. Make sure the adapter can supply at least 2 amps of current.
F. Battery level
The unit shows the battery level with both vibrations and the colour of the lights. A full battery gives a green colour and four vibrations.
- Green: 4 vibrations
- Blue: 3 vibrations
- Purple: 2 vibrations
- Red: 1 vibration
G. Replacing the battery
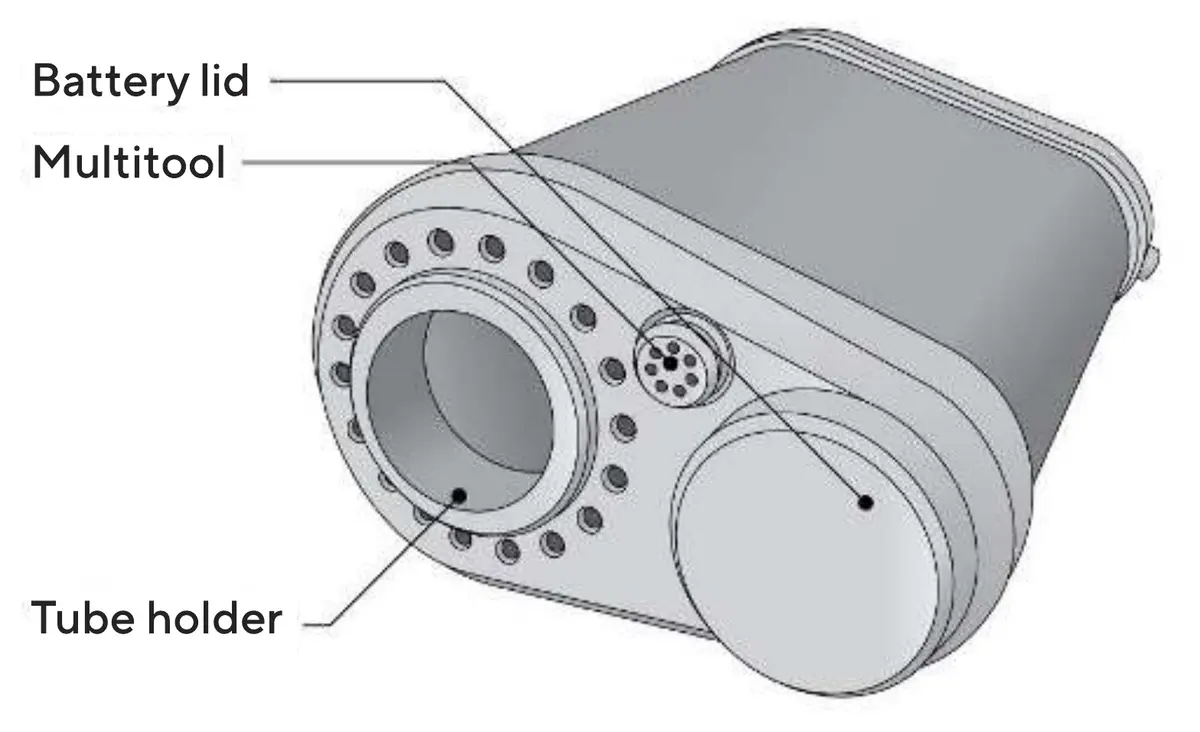
Open the battery lid by turning it anti-clockwise. Replace the battery: the positive end of the battery faces the lid. If the lid does not turn comfortably, you can apply some oil to the threads of the lid.
H. Adjusting the chamber capacity
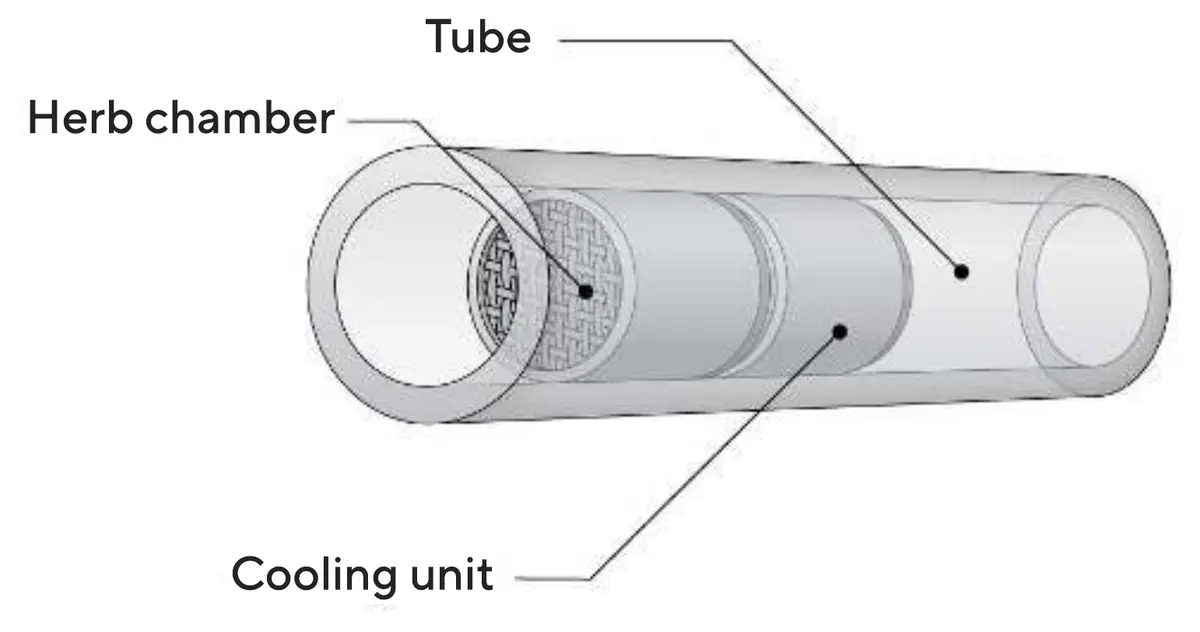
The cooling unit moves within the glass tube. You can move it easily with the multitool of the unit. Do not push on the mesh screen, push from the solid sides of the cooling unit. This enables micro dosing, macro dosing and anything in between.
I. Beast mode
Turn the temperature setting to maximum: the lights change colour to white instead of showing the battery level, and the unit delivers its highest available heat level. Be careful with this, it is much hotter than level 9. Beast mode is available only in on-demand mode.
J. Stealth mode
To disable the lights of the unit, turn it on in session mode. Turn the temperature to maximum and press the button once. Turn the temperature to minimum and press the button once. The lights are now off. Opening and closing the battery lid resets the setting back to normal.
K. Cleaning
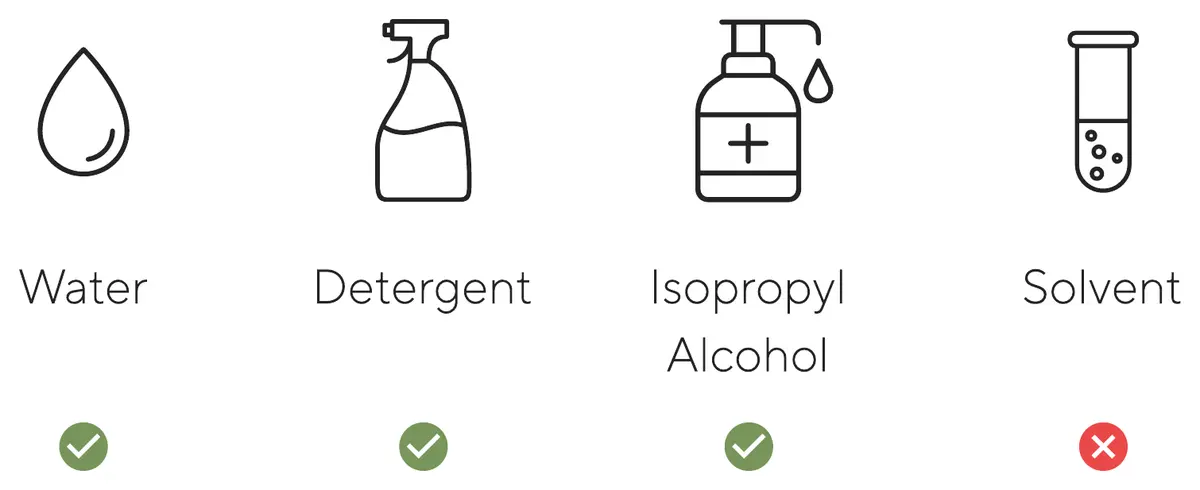
The glass tube can be washed with water and detergent, or submerged in isopropyl alcohol. Do not place the O-rings in the solvent.
Some internal parts come out easily for cleaning: unscrew the tube holder ring with your fingers, remove the red O-ring and the metal insert. These parts can be washed like the glass tube.
Appendix 1: temperature at each level
| Level | Temperature |
|---|---|
| 0 | Lock |
| 1 | 140 °C / ~290 °F |
| 2 | 150 °C / ~310 °F |
| 3 | 160 °C / ~330 °F |
| 4 | 170 °C / ~345 °F |
| 5 | 180 °C / ~360 °F |
| 6 | 190 °C / ~380 °F |
| 7 | 200 °C / ~395 °F |
| 8 | 210 °C / ~410 °F |
| 9 | 220 °C / ~430 °F |
| 10 | 250 °C / ~490 °F (session mode limited to 230 °C / ~450 °F) |
Appendix 2: changing the temperature range
- Open and close the battery lid.
- Turn the temperature dial to 0 and triple-click the button. The lights at the bottom of the unit flash for a moment. Wait a couple of seconds.
- Repeat the previous step four times.
- Turn the dial to 6 and triple-click the button. The unit vibrates continuously and shows a green light at the back.
- Choose a higher or lower temperature range by turning the dial. Level 6 (green) is the default range, level 10 (white) gives the highest temperatures and 0 (blue) the lowest.
- Press and hold the button for about 5 seconds, until all vibrations have stopped, then release. Turn the unit off with a triple click. The temperature range is now adjusted.
Was this page helpful?
Still have a question?